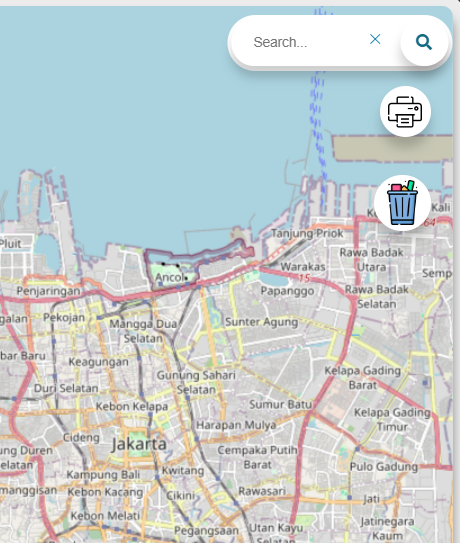
7. Create Search Bar and Print Feature

Tutorial: Implementing a Search Feature with React and Leaflet
In this tutorial, we will build a Search component that allows users to search for locations and display the results on a map with a popup containing location information. We will use React, React-Leaflet, and leaflet-geosearch for this component.
1. Import Required Libraries
import React, { useState } from "react";

import { useMap } from "react-leaflet";

import { OpenStreetMapProvider } from "leaflet-geosearch";

import L from "leaflet";
Explanation:
useState: React hook for managing local state.useMap: Hook from React-Leaflet to get the map instance.OpenStreetMapProvider: Provider from leaflet-geosearch for geocoding locations based on text.L: Leaflet shorthand for accessing APIs like popup and view settings.
2. Initialize the Search Component
const Search = () => {

const map = useMap();

const [searchText, setSearchText] = useState("");

const [popup, setPopup] = useState(null);

const [suggestions, setSuggestions] = useState([]);

const [isExpanded, setIsExpanded] = useState(false);
Explanation:
map: Gets the map instance fromuseMap.searchText: State to store the user’s search input.popup: State to store the active popup reference on the map.suggestions: State to store location suggestions based on the search text.isExpanded: State to manage the display of the search input field.
3. Handle Search Input Changes
const handleSearchInputChange = (e) => {

const userInput = e.target.value;

setSearchText(userInput);

const provider = new OpenStreetMapProvider();

provider

.search({ query: userInput })

.then((results) => {

const suggestions = results.map((result) => result.label);

setSuggestions(suggestions);

})

.catch((error) => {

console.error("Error fetching search suggestions:", error);

setSuggestions([]);

});

};
Explanation:
- Updates
searchTextwhenever the user types. - Uses
OpenStreetMapProviderto fetch location suggestions based on user input. - Stores the suggestions in the
suggestionsstate.
4. Handle Clicks on Location Suggestions
const handleSuggestionClick = (suggestion) => {

setSearchText(suggestion);

setSuggestions([]);

};
Explanation:
- Updates
searchTextwhen a user selects a suggestion and clears the suggestions list.
5. Handle Search Form Submission
const handleSearch = async (e) => {

e.preventDefault();

if (!searchText.trim()) return;

const provider = new OpenStreetMapProvider();

const results = await provider.search({ query: searchText });

if (results.length > 0) {

const { x, y, label } = results[0];

const latLng = L.latLng(y, x);

map.setView(latLng, 10);

if (popup) {

popup.removeFrom(map);

}

const newPopup = L.popup()

.setLatLng(latLng)

.setContent(

`<b>${label}</b><br>Latitude: ${y.toFixed(6)}, Longitude: ${x.toFixed(6)}`

)

.openOn(map);

setPopup(newPopup);

}

};
Explanation:
- Searches for the location based on the input text when the form is submitted.
- If a location is found, updates the map view to the location and displays a popup with location information.
6. Clear Search Input
const clearInput = () => {

setSearchText('');

setIsExpanded(false);

};
Explanation:
- Clears the search input and resets the input field to its default state.
7. Render the Search Component
  return (

<form onSubmit={handleSearch} onMouseEnter={() => setIsExpanded(true)}

onMouseLeave={() => setIsExpanded(searchText !== '')} style={{

position: "absolute",

top: "1%",

left: "94%",

transform: "translate(-50%, 0)",

zIndex: 1000,

}}>

<input

className="srch"

type="text"

value={searchText}

onChange={handleSearchInputChange}

list="searchSuggestions"

placeholder="Search..."

required

/>

<datalist id="searchSuggestions">

{suggestions.map((suggestion, index) => (

<option key={index} value={suggestion} />

))}

</datalist>

<button type="submit" className="fa fa-search"></button>

<a

href="#"

onClick={clearInput}

className={isExpanded ? "clear-link visible" : "clear-link"}

>

✕

</a>

</form>

);

};
Explanation:
- Creates a search form with a text input, location suggestions, a submit button, and a clear button.
- Uses inline CSS to position the form over the map.
8. Export the Component
export default Search;
Explanation:
- Exports the
Searchcomponent for use in other parts of the application.
This tutorial outlines how to build a location search feature using React and Leaflet, including fetching location data, showing suggestions, and updating the map with search results.
